-
05 API를 작성하는 다양한 방법공부/스프링부트 핵심가이드 2023. 7. 16. 21:08728x90
5.1 프로젝트 설정
groupid 'com.springboot'로 설정, name과 artifactId는 'api'로 설정
5.2 GET API 만들기
웹 애플리케이션 서버에서 값을 가져올 때 사용하는 API
실무에서는 HTTP메서드에 따라 컨트롤러 클래스를 구분하지 않습니다만 여기서는 메서드별로 클래스 생성
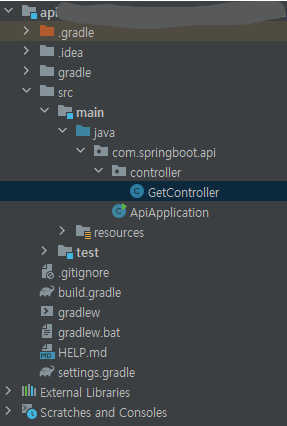
@RestController
@RequestMapping("api/v1/get-api")
public class GetController{
}
컨트롤러에 @RestController와 @RequestMapping을 붙여 내부에 선언되는 메서드에서 사용할 공통 URL설정
클래스 수준에서 @RequestMapping을 설정하면 내부에 선언한 메서드의 URL리소스 앞에 @RequestMapping의 값이 공통값으로 추가
5.2.1 @RequestMapping으로 구현하기
@RequestMapping 어노테이션을 별다른 설정없이 선언하면 HTTP의 모든 요청을 받음
그러나 GET형식의 요청만 받기 위해서는 어노테이션에 별도 설정이 필요
@RequestMapping어노테이션의 method요소의 값을 RequestMethod.GET으로 설정하면 요청 형식을 GET으로만 설정할 수 있음
더보기스프리 4.3버전 이후로는 새로 나온 아래의 어노테이션을 사용하기 때문에 @RequestMapping어노테이션은 더 이상 사용되지 않음
아래의 각 HTTP메서드에 맞는 어노테이션 사용 예정
@GetMapping/@PostMapping/@PutMapping/@DeleteMapping
package com.springboot.api.controller;

import org.springframework.web.bind.annotation.RequestMapping;
import org.springframework.web.bind.annotation.RequestMethod;
import org.springframework.web.bind.annotation.RestController;

@RestController
@RequestMapping("/api/v1/get-api")

public class GetController {

    //http://localhost:8080/api/v1/get-api/hello
    @RequestMapping(value="/hello",method= RequestMethod.GET)
    public String gethello(){
        return "Hello World";
    }
}
5.2.2 매개변수가 없는 GET 메서드 구현
package com.springboot.api.controller;

import org.springframework.web.bind.annotation.GetMapping;
import org.springframework.web.bind.annotation.RequestMapping;
import org.springframework.web.bind.annotation.RequestMethod;
import org.springframework.web.bind.annotation.RestController;

@RestController
@RequestMapping("/api/v1/get-api")

public class GetController {

    //http://localhost:8080/api/v1/get-api/hello
    @GetMapping(value="/name")
    public String getName(){
        return "Flature";
    }
}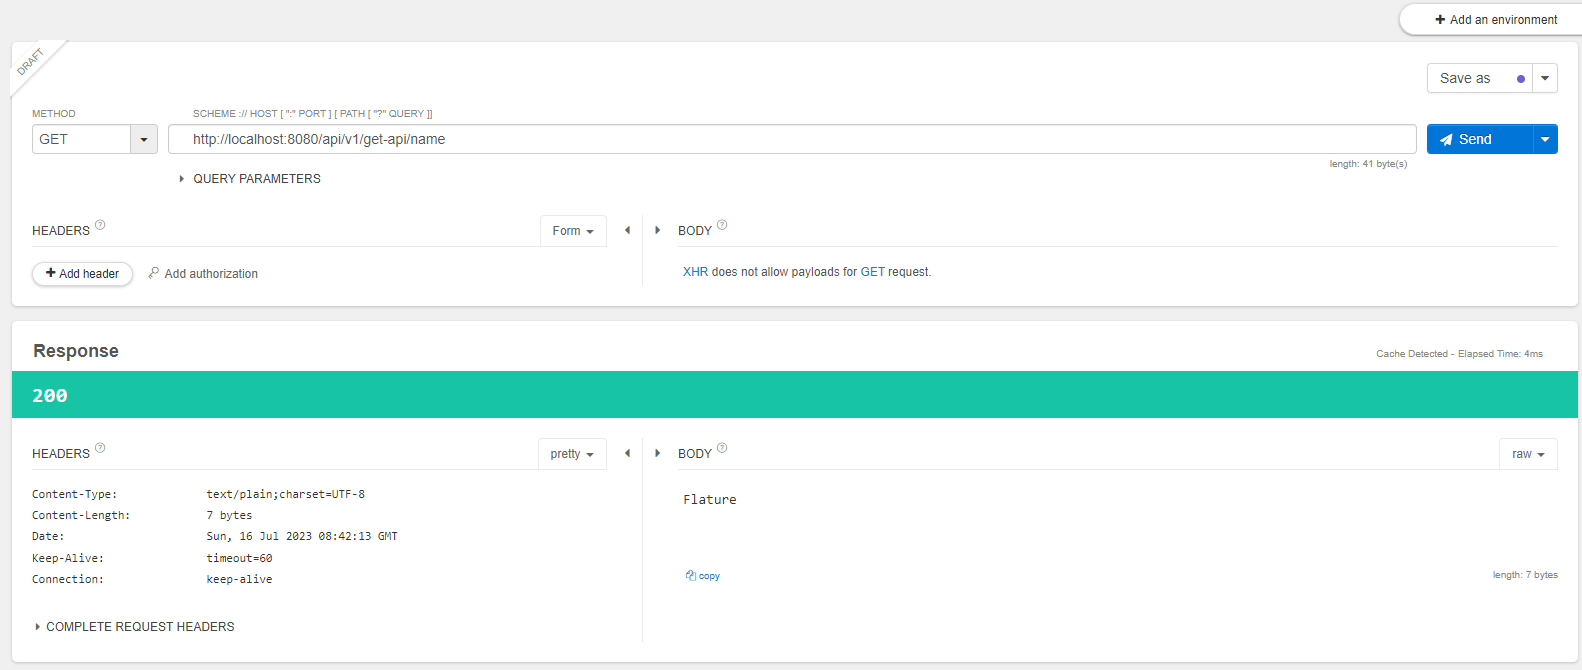
5.2.3 @PathVariable을 활용한 GET 메서드 구현
실무 환경에서는 매개변수를 받지 않는 메서드가 거의 쓰이지 않음
웹 통신의 기본 목적은 데이터를 주고 받는 것이기 때문에 대부분 매개변수를 받는 메서드를 작성
매개변수를 받을 때 자주 쓰이는 방법 중 하나는 URL 자체에 값을 담아 요청하는 것
package com.springboot.api.controller;

import org.springframework.web.bind.annotation.*;

@RestController
@RequestMapping("/api/v1/get-api")

public class GetController {

    //http://localhost:8080/api/v1/get-api/Variable1{String값}
    @GetMapping(value="/variable1/{variable}")
    public String getVariable1(@PathVariable String variable){
        return variable;
    }
}
//http://localhost:8080/api/v1/get-api/variable1/{String값}


5.2.4 @RequestParam을 활용한 GET메서드 구현
package com.springboot.api.controller;

import org.springframework.web.bind.annotation.*;

@RestController
@RequestMapping("/api/v1/get-api")

public class GetController {

    //http://localhost:8080/api/v1/get-api/request1?name=value1&email=value2&organization=value3
    @GetMapping(value="/request1")
    public String getRequestParam1(
            @RequestParam String name,
            @RequestParam String email,
            @RequestParam String organization){
                return name+" "+email+" "+organization;
}
}
만약 쿼리스트링에 어떤 값이 들어올지 모른다면 아래와 같이 Map객체를 활용할수도 있음
package com.springboot.api.controller;

import org.springframework.web.bind.annotation.*;

import java.util.Map;

@RestController
@RequestMapping("/api/v1/get-api")

public class GetController {

    //http://localhost:8080/api/v1/get-api/request2?key1=value1&key2=value2
    @GetMapping(value = "/request2")
    public String getRequestParam2(@RequestParam Map<String, String> param) {
        StringBuilder sb = new StringBuilder();

        param.entrySet().forEach(map -> {
            sb.append(map.getKey() + " : " + map.getValue() + "\n");
        });
        return sb.toString();
    }
}
더보기
더보기URI와 URL의 차이
URL은 우리가 흔히 말하는 웹주소를 의미
리소스가 어이에 있는지 알려주기 위한 경로
반면 URI는 특정리소스를 식별할 수 있는 식별자를 의미
웹에서는 URL을 통해 리소스가 어느 서버에 위치해 있는지 알 수 있으며, 그 서버에 접근해서 리소스에 접근하기 위해서는 대부분URI가 필요
5.2.5 DTO객체를 활용한 GET메서드 구현
DTO란?
Data Transfer Object의 약자로 다른 레이어 간의 데이터 교환에 활용
간략하게 설명하자면 각 클래스 및 인터페이스를 호출하면서 전달하는 매개변수로 사용되는 데이터 객체
DTO는 데이터를 교환하는 용도로만 사용하는 객체이기 때문에 DTO에는 별도의 로직이 포함되지 않음
더보기DTO와 VO
DTO와 VO(Value Object)의 역할을 서로 엄밀하게 구분하지 않고 사용할 때가 많음
이렇게 해도 대부분의 상황에서는 큰 문제가 발생하지 않지만 정확하게 구분하자면 역할과 사용법에 차이
먼저 VO는 데이터 그 자체로 의미가 있는 객체
VO의 가장 특징적인 부분은 읽기전용으로 설계한다는 점
즉, VO는 값을 변경할 수 없게 만들어 데이터의 신뢰성을 유지
DTO는 데이터 전송을 위해 사용되는 데이터 컨테이너로 볼 수 있음
즉, 같은 애플리케이션 내부에서 사용되는 것이 아니라 다른 서버(시스템)으로 전달하는 경우에 사용
본문에서는 DTO가 다른 레이어 간 데이터 교환에 활용된다고 설명
여기서 레이어는 애플리케이션 내부에 정의된 레이어일수도 있고 인프라 관점에서의 서버 아키텍처 상의 레이어일수도 있음
이러한 개념의 혼용이 DTO와 VO의 차이를 흐리게 만듦
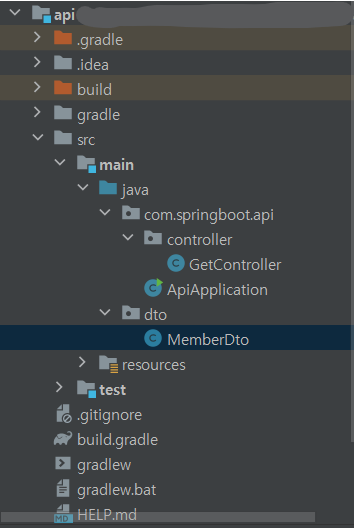
//dto/MemberDto에 작성

package dto;

import org.springframework.web.bind.annotation.GetMapping;
import org.springframework.web.bind.annotation.RequestMapping;
import org.springframework.web.bind.annotation.RestController;

public class MemberDto {

    private String name;
    private String email;
    private String organization;

    public String getName() {
        return name;
    }

    public void setName(String name) {
        this.name = name;
    }

    public String getEmail() {
        return email;
    }

    public void setMail(String email) {
        this.email = email;
    }

    public String getOrganization() {
        return organization;
    }

    public void setOrganization(String organization) {
        this.organization = organization;
    }

    @Override
    public String toString() {
        return "MemberDto{" + "name='" + name + '\'' + ", email='" + email + '\'' + ", organization='" + organization + '\'' + '}';
    }
}
//com.springboot.api/controller/GetController 에 작성 package com.springboot.api.controller; import dto.MemberDto; import org.springframework.web.bind.annotation.*; import java.util.Map; @RestController @RequestMapping("/api/v1/get-api") public class GetController { //http://localhost:8080/api/v1/get-api/request3?name=value1&email=value2&organization=value3 //@ApiOperation(value = "GET 메소드 예제", notes = "DTO를 활용한 GET Method")->이거 안돌아감 왜? @GetMapping(value="/request3") public String getRequestParam3(MemberDto memberDto){ //return memberDto.getName()+" "+memberDto.getEmail()+" "+memberDto.getOrganization(); return memberDto.toString(); } }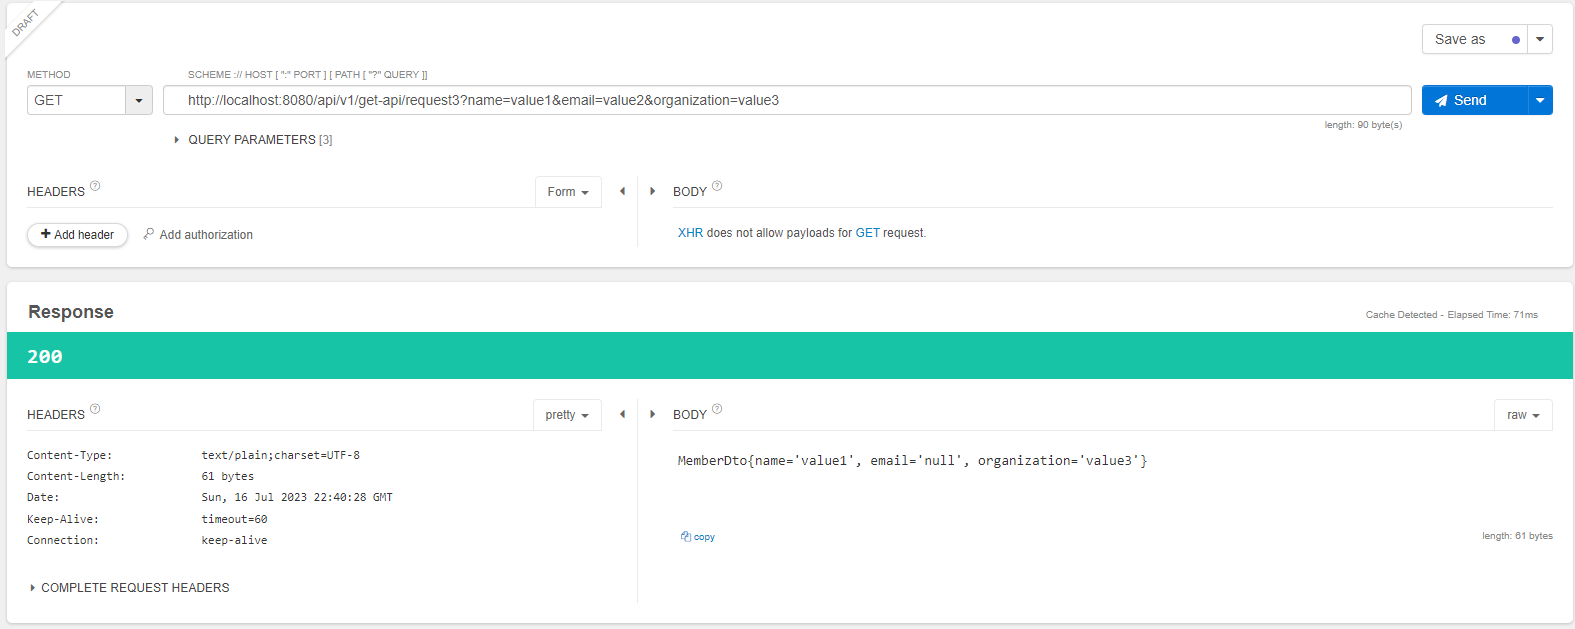
5.3 POST API만들기
POST API는 웹 애플리케이션을 통해 데이터베이스 등의 저장소에 리소스를 저장할 때 사용되는 API
앞에서 살펴본 GET API에서는 URL의 경로나 파라미터에 변수를 넣어 요청을 보냈지만 POST API에서 저장하고자 하는 리소스나 값을 HTTP 바디(body)에 담아 서버에 전달
그래서 URI가 GET API에 비해 간단
POSTAPI를 만들기 위해 PostController라는 이름의 컨트롤러 클래스를 생성하고 @RequestMapping어노테이션을 이용해 공통 URL을 설정

package com.springboot.api.controller;

import org.springframework.web.bind.annotation.RequestMapping;
import org.springframework.web.bind.annotation.RestController;

@RestController
@RequestMapping("api/v1/post-api")
public class PostController {
}
5.3.1 @RequestMapping으로 구현하기
package com.springboot.api.controller;

import org.springframework.web.bind.annotation.RequestMapping;
import org.springframework.web.bind.annotation.RequestMethod;
import org.springframework.web.bind.annotation.RestController;

@RestController
@RequestMapping("api/v1/post-api")
public class PostController {
    @RequestMapping(value="/domain", method= RequestMethod.POST)
    public String postExmaple(){
        return "Hello Post Api";
    }
}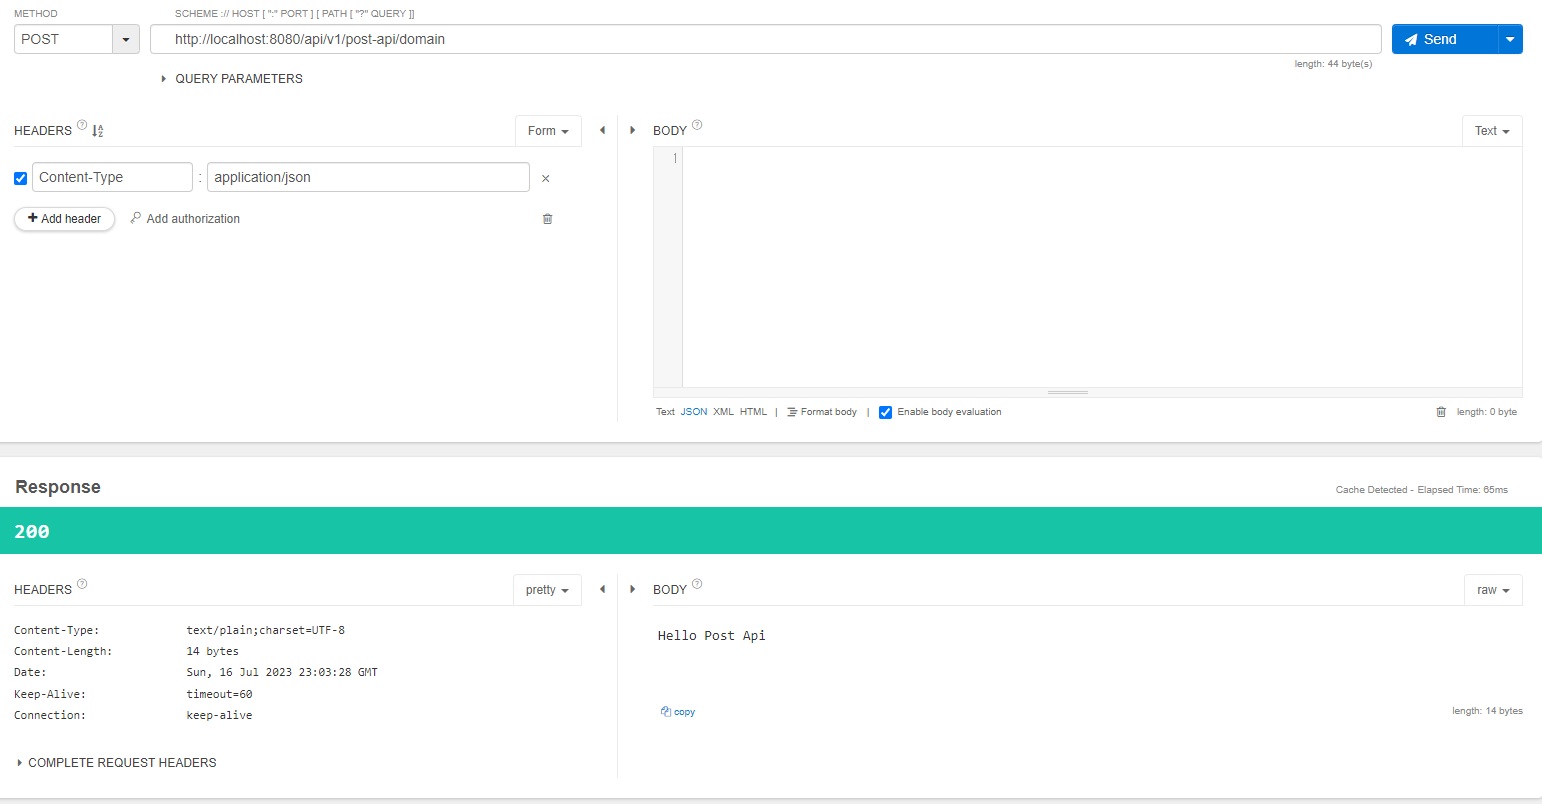
5.3.2 @RequestBody를 활용한 POST 메서드 구현
위의 예제에서는 별도의 리소스를 받지 않고 단지 POST요청만 받는 메서드를 구현
일반적으로 POST형식의 요청은 클라이언트가 서버에 리소스를 저장하는 데 사용
클라이언트의 요청 트래픽에 값이 포함되어 있음
즉, POST요청에서는 리소스를 담기 위해 HTTP Body에 값을 넣어 전송
Body영역에 작성되는 값은 일정한 형태를 취함
일반적으로 JSON형식으로 전송되며, 대중적으로 사용되는 JSON형식으로 값을 주고받을 예정
package com.springboot.api.controller;

import org.springframework.web.bind.annotation.*;

@RestController
@RequestMapping("api/v1/post-api")
public class PostController {
    //http://localhost:8080/api/v1/post-api/member
    @PostMapping(value="/member")
    public String postMember(@RequestBody Map<String, Object> postData){
        StringBuilder sb= new StringBuilder();

        postData.entrySet().forEach(map->{
            sb.append(map.getKey()+":"+map.getValue()+"\n");
        });
    return sb.toString();
    }
}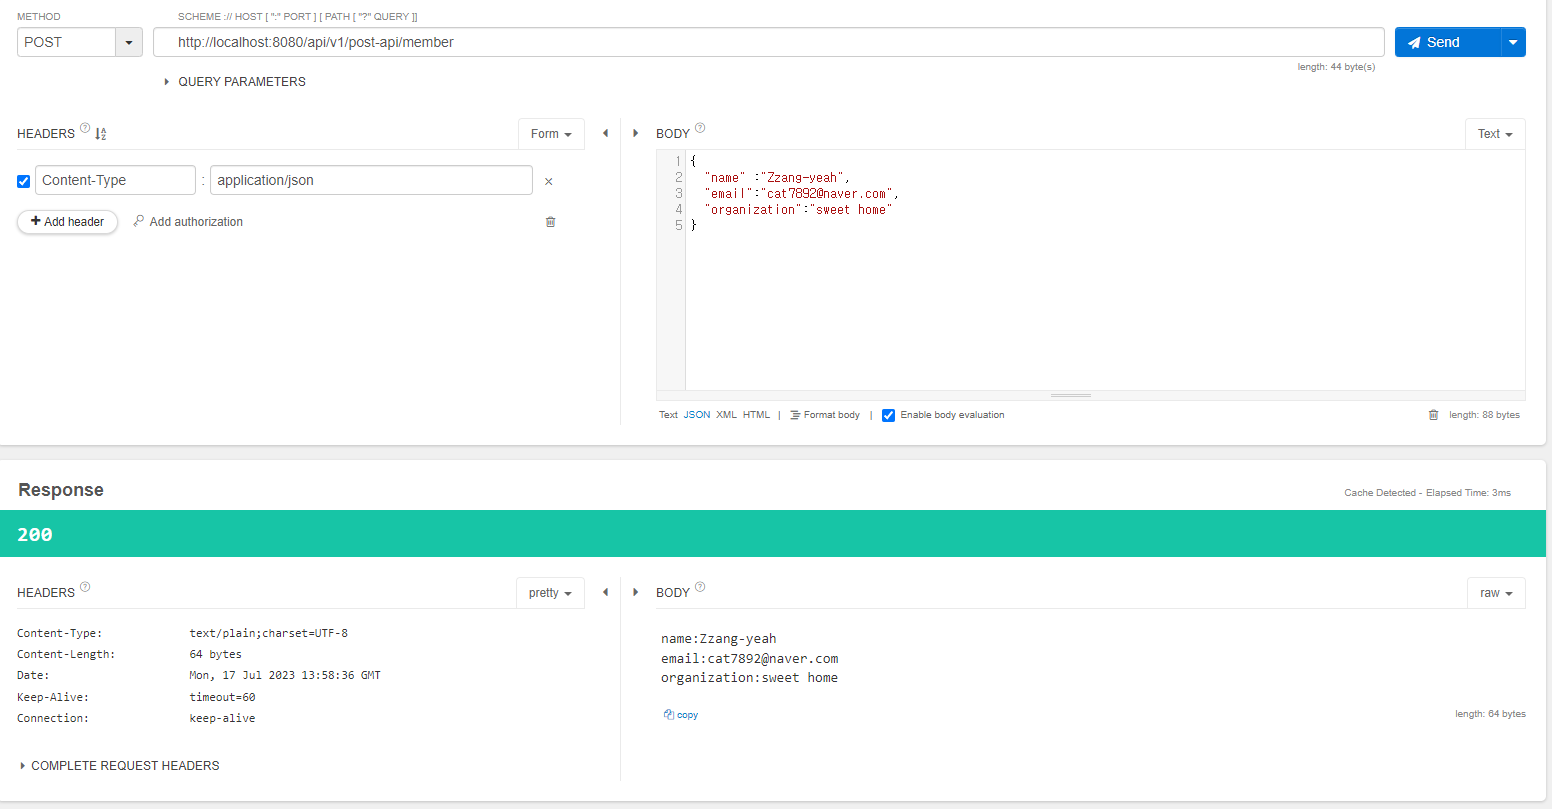
@RequestMapping대신 PostMapping을 사용
이 어노테이션을 사용하면 method요소를 정의하지 않아도 됨
@RequestBody라는 어노테이션을 사용했는데 이는 HTTP의 Body내용을 해당 어노테이션이 지정된 객체에 매핑하는 역할
Map객체는 요청을 통해 어떤 값이 들어오게 될지 특정하기 어려울 때 주로 사용
요청 메시지에 들어갈 값이 정해져 있다면 DTO객체를 매개변수로 삼아 작성할 수 있음
예제의 DTO객체는 앞에서 사용한 DTO객체와 동일하므로 생략
package com.springboot.api.controller;

import dto.MemberDto;
import org.springframework.web.bind.annotation.*;

import java.util.Map;

@RestController
@RequestMapping("api/v1/post-api")
public class PostController {
    //http://localhost:8080/api/v1/post-api/member2
    @PostMapping(value="/member2")
    public String postMemberDto(@RequestBody MemberDto memberDto){
        return memberDto.toString();
    }
}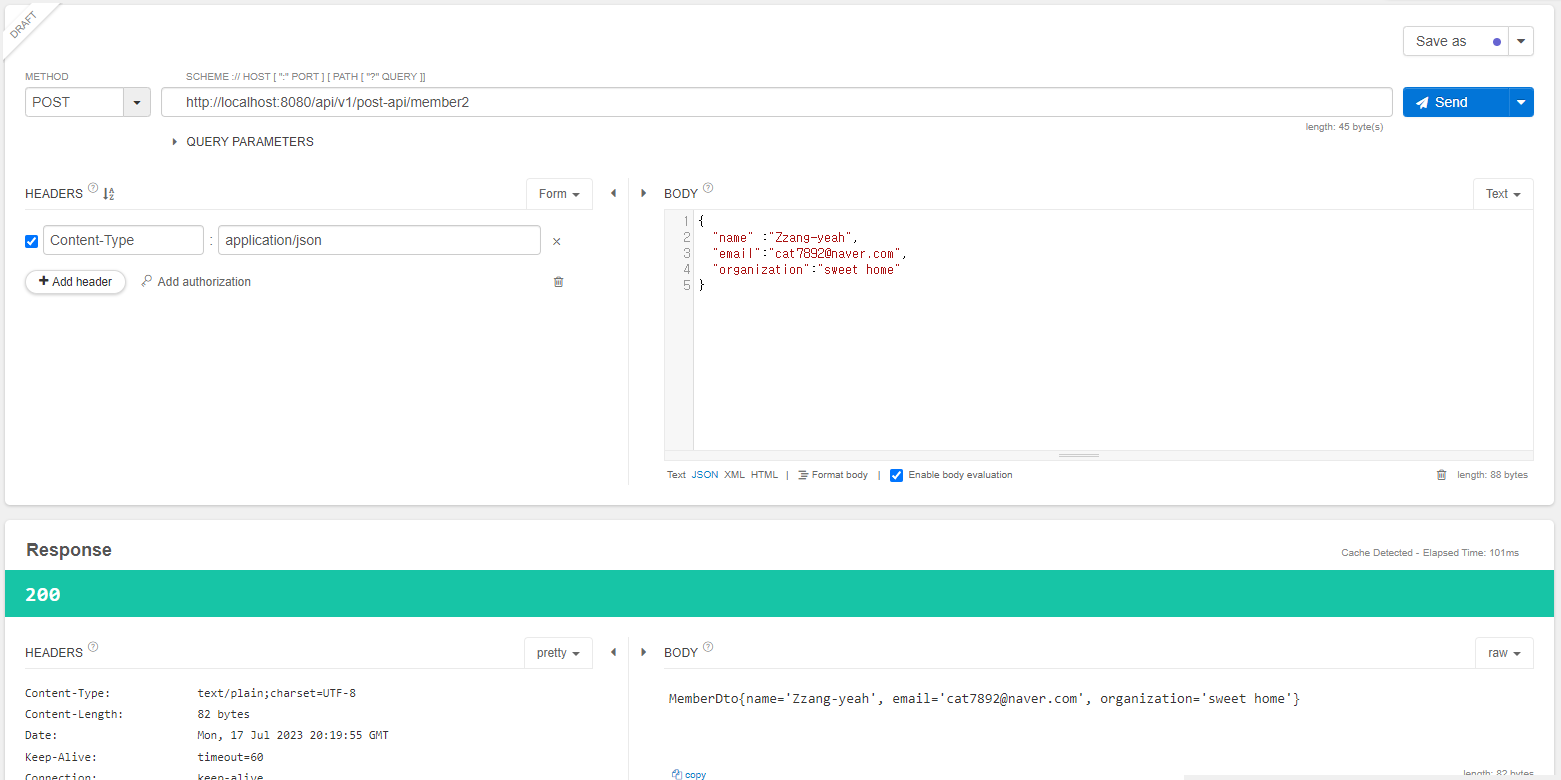
5.4 PUT API만들기
웹 애플리케이션 서버를 통해 데이터베이스 같은 저장소에 존재하는 리소스 값을 업데이트 하는데 사용
POST API와 비교하면 요청을 받아 실제 데이터베이스에 반영하는 과정에서 차이가 있지만 컨트롤러 클래스를 구현하는 방법은 POST API와 거의 동일
리소스를 서버에 전달하기 위해 HTTP Body를 활용해야하기 때문
package com.springboot.api.controller;

import org.springframework.web.bind.annotation.RequestMapping;
import org.springframework.web.bind.annotation.RestController;

@RestController
@RequestMapping("/api/v1/put-api")
public class PutController {

}
5.4.1 @RequestBody를 활용한 PUT메서드 구현
PUT API는 POST메서드와 마찬가지로 값을 HTTP Body에 담아 전달
서버에서는 이 값을 받기 위해 @RequestBody를 사용
package com.springboot.api.controller;

import org.springframework.web.bind.annotation.PutMapping;
import org.springframework.web.bind.annotation.RequestBody;
import org.springframework.web.bind.annotation.RequestMapping;
import org.springframework.web.bind.annotation.RestController;

import java.util.Map;

@RestController
@RequestMapping("/api/v1/put-api")
public class PutController {
    //http://localhost:8080/api/v1/put-api/member
    @PutMapping(value="/member")
    public String postMember(@RequestBody Map<String, Object> putData){
        StringBuilder sb= new StringBuilder();

        putData.entrySet().forEach(map->{
            sb.append(map.getKey()+":"+map.getValue()+"\n");
        });
        return sb.toString();
    }
}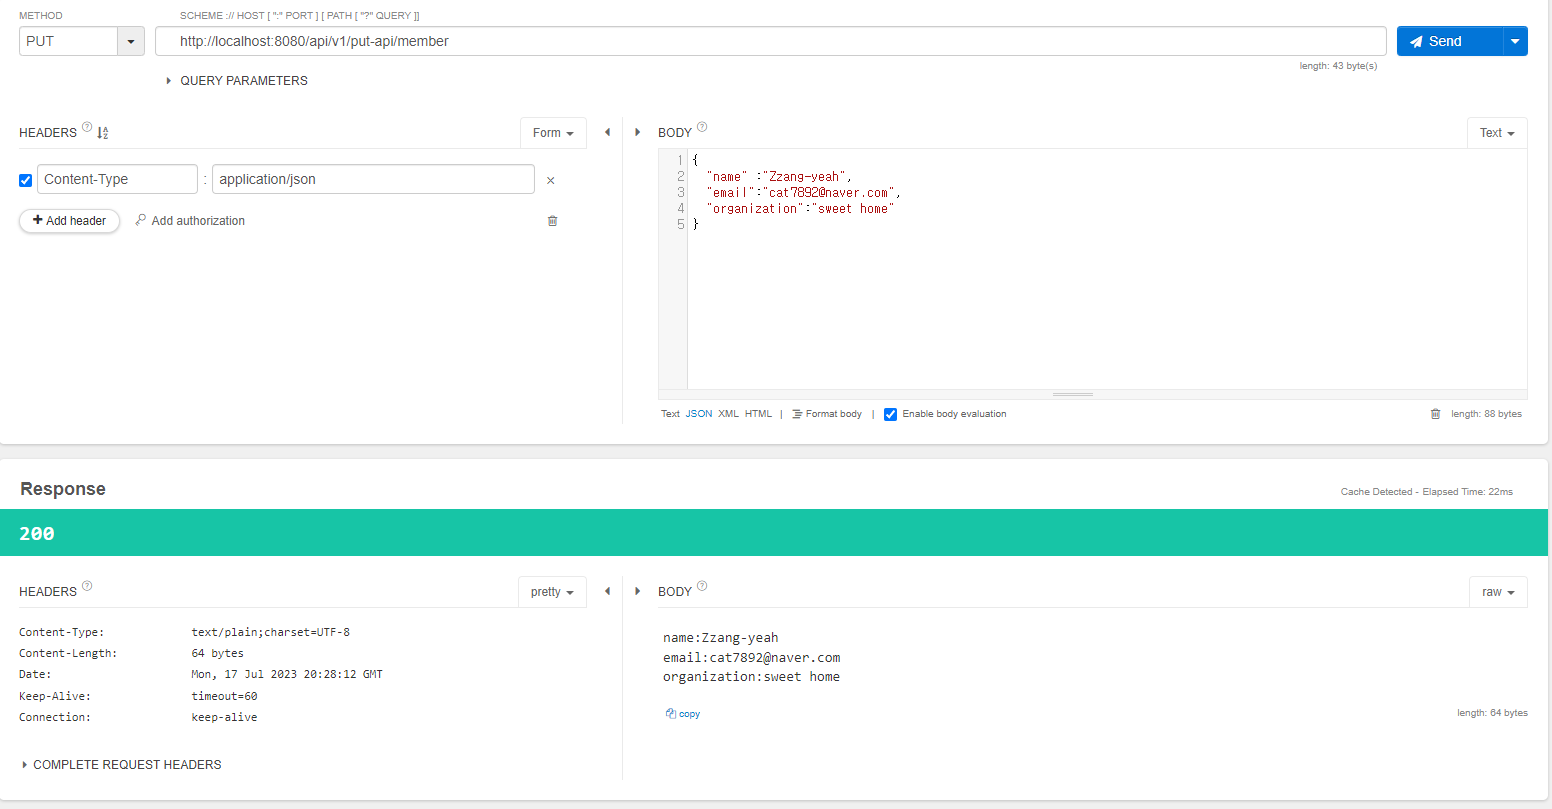
서버에 어떤 값이 들어올지 모르는 경우에는 Map객체를 활용해 값을 받을 수 있음
대부분의 경우 API를 개발한 쪽에서 작성한 명세(specification)를 웹사이트를 통해 클라이언트나 사용자에게 올바른 사용법을 안내
만약 서버에 들어오는 요청에 담겨 있는 값이 정해져있는 경우에는 아래와 같이 DTO객체를 활용하여 구현
package com.springboot.api.controller;

import dto.MemberDto;
import org.springframework.web.bind.annotation.PutMapping;
import org.springframework.web.bind.annotation.RequestBody;
import org.springframework.web.bind.annotation.RequestMapping;
import org.springframework.web.bind.annotation.RestController;

import java.util.Map;

@RestController
@RequestMapping("/api/v1/put-api")
public class PutController {
	//http://localhost:8080/api/v1/put-api/member1
    @PutMapping(value="/member1")
    public String postMemberDto1(@RequestBody MemberDto memberDto){
        return memberDto.toString();
    }
}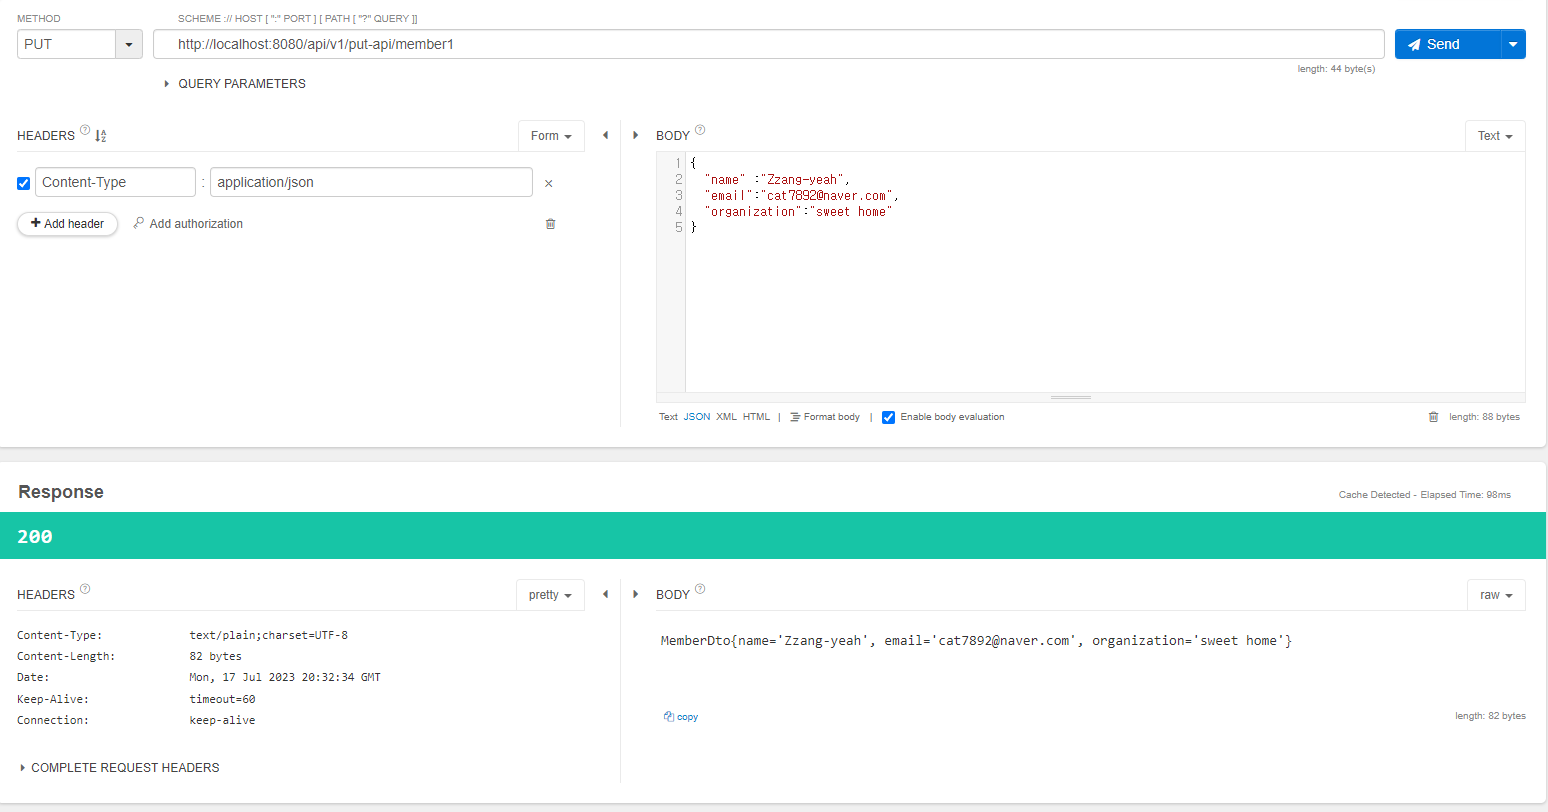
package com.springboot.api.controller;

import dto.MemberDto;
import org.springframework.web.bind.annotation.PutMapping;
import org.springframework.web.bind.annotation.RequestBody;
import org.springframework.web.bind.annotation.RequestMapping;
import org.springframework.web.bind.annotation.RestController;

import java.util.Map;

@RestController
@RequestMapping("/api/v1/put-api")
public class PutController {
	//http://localhost:8080/api/v1/put-api/member2
    @PutMapping(value="/member2")
    public MemberDto postMemeberDto2(@RequestBody MemberDto memberDto){
        return memberDto;
    }
}
member1메서드로 전달받은 값은 text/plain
member2메서드로 전달받은 값은 application/json
@RestController 어노테이션이 지정된 클래스는 @ResponseBody를 생략할 수 있는데, 이 @ResponseBody어노테이션은 자동으로 값을 JSON과 같은 형식으로 변환해서 전달하는 역할 수행
5.4.2 ResponseEntity를 활용한 PUT메서드 구현
package com.springboot.api.controller;

import dto.MemberDto;
import org.springframework.http.HttpStatus;
import org.springframework.http.ResponseEntity;
import org.springframework.web.bind.annotation.PutMapping;
import org.springframework.web.bind.annotation.RequestBody;
import org.springframework.web.bind.annotation.RequestMapping;
import org.springframework.web.bind.annotation.RestController;

import java.net.http.HttpHeaders;
import java.util.Map;

@RestController
@RequestMapping("/api/v1/put-api")
public class PutController {
    // http://localhost:8080/api/v1/put-api/member3
    @PutMapping(value = "/member3")
    public ResponseEntity<MemberDto> postMemberDto3(@RequestBody MemberDto memberDto) {
        return ResponseEntity
                .status(HttpStatus.ACCEPTED)
                .body(memberDto);
    }
}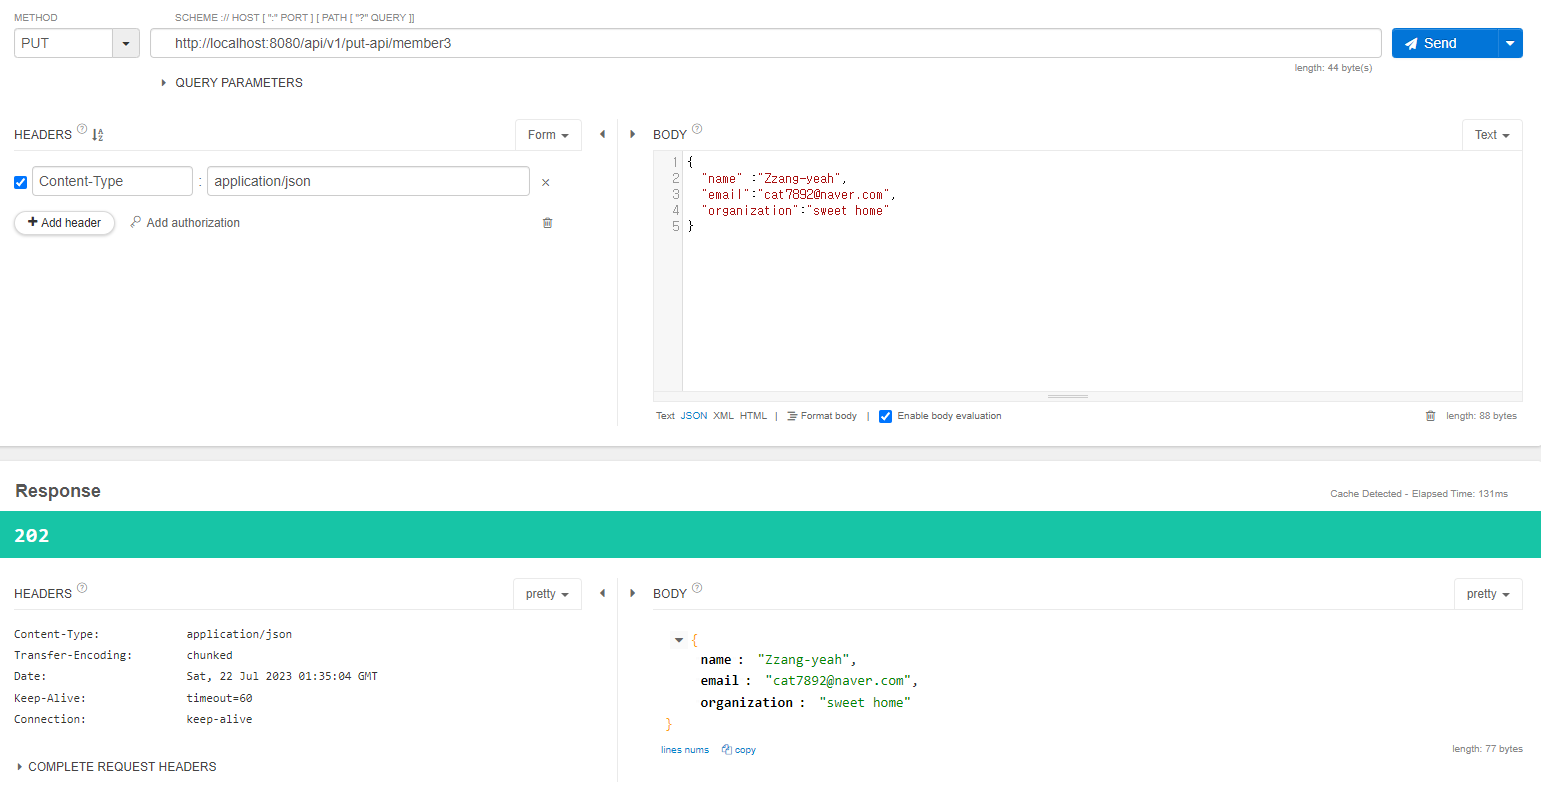
5.5 DELETE API 만들기
웹 애플리케이션 서버를 거쳐 데이터베이스 등의 저장소에 있는 리소스를 삭제할 때 사용
서버에서는 클라이언트로부터 리소스를 식별할 수 있는 값을 받아 데이터베이스나 캐시에 있는 리소스를 조회하고 삭제하는 역할을 수행
컨트롤러를 통해 값을 받는 단계에서는 간단한 값을 받기 때문에 GET메서드와 같이 URI에 값을 넣어 요청을 받는 형식
@RestController
@REquestMapping("api/v1/delete-api")
public class DeleteController{

}
DeleteController 클래스
5.5.1 @PathVariable과 @RequestParmam을 활용한 DELETE 메서드 구현
package com.springboot.api.controller;

import org.springframework.web.bind.annotation.DeleteMapping;
import org.springframework.web.bind.annotation.PathVariable;
import org.springframework.web.bind.annotation.RequestMapping;
import org.springframework.web.bind.annotation.RestController;

@RestController
@RequestMapping("/api/v1/delete-api")
public class DeleteController {

    //http://localhost:8080/api/v1/delete-api/{String값}
    @DeleteMapping(value="/{variable}")
    public String DeleteVariable(@PathVariable String variable) {
        return variable;
    }
}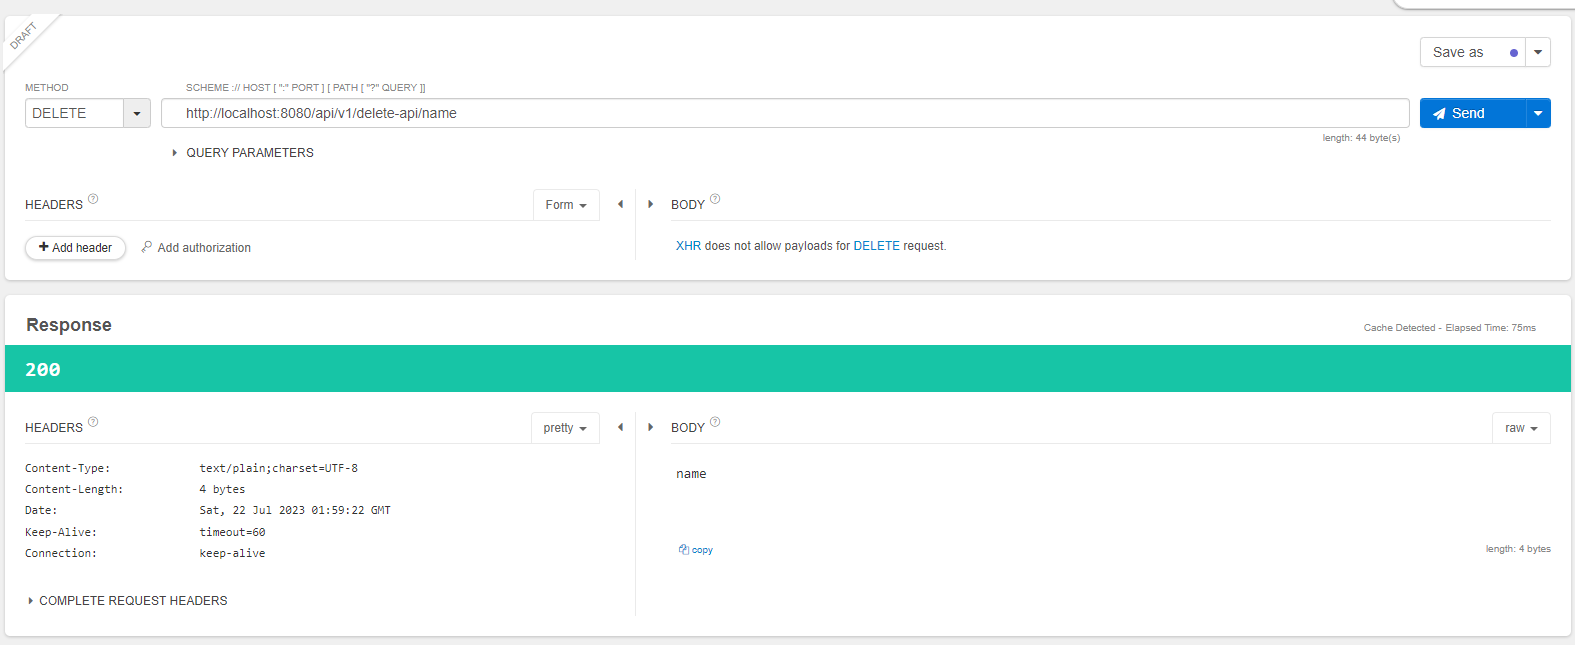
@RequestParam을 활용한 DELETE 메서드 구현
package com.springboot.api.controller;

import org.springframework.web.bind.annotation.*;

@RestController
@RequestMapping("/api/v1/delete-api")
public class DeleteController {

    //http://localhost:8080/api/v1/delete-api/request1?email=value
    @DeleteMapping(value="/request1")
    public String getRequestParam1(@RequestParam String email) {
        return "e-mail:"+email;
    }
}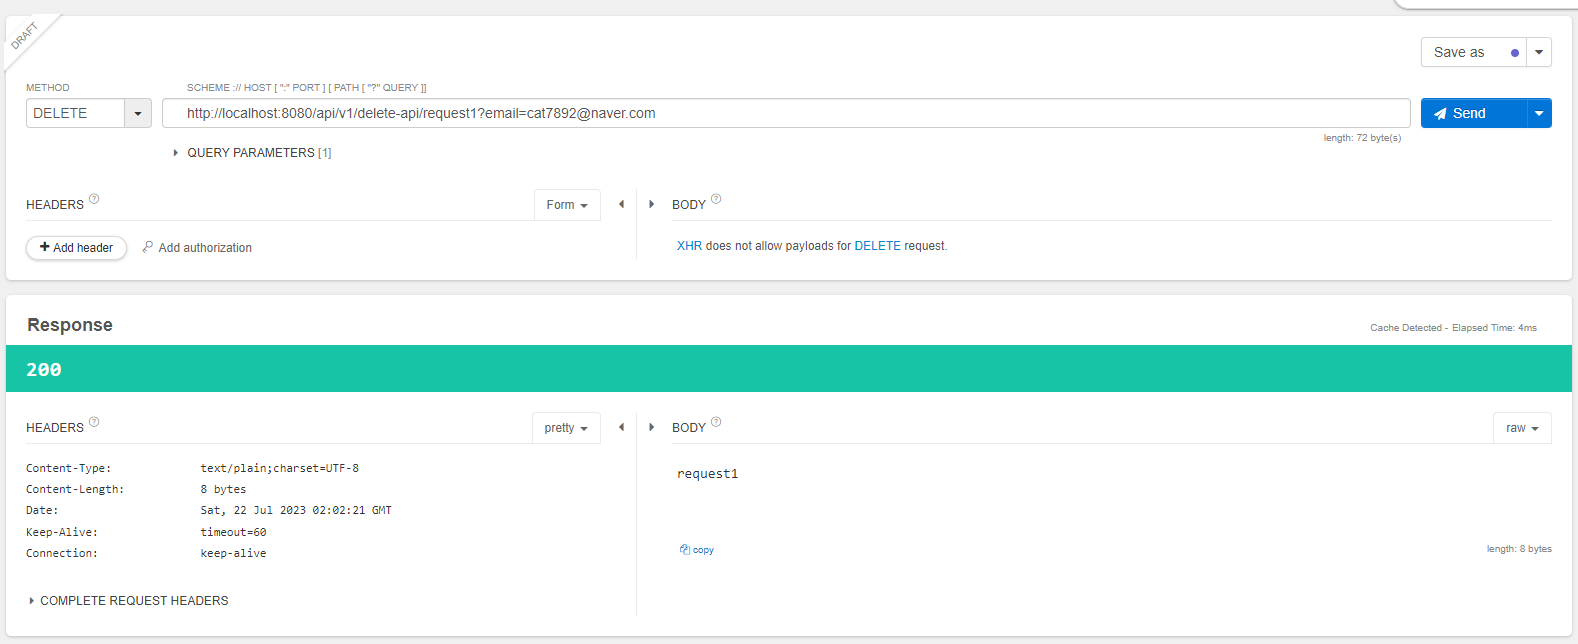
5.6 [한걸음 더]REST API 명세를 문서화하는 방법 - Swagger
API를 개발하면 명세를 관리해야함
명세란 해당 API가 어떤 로직을 수행하는지 설명하고 이 로직을 수행하기 위해 어떤 값을 요청하며, 이에 따른 응답값으로는 무엇을 받을 수 있는지를 정리한 자료
API는 개발과정에서 계속 변경3되므로 작성한 명세 문서도 주기적인 업데이트가 필요
명세 작업은 번거롭고 시간 또한 오래 걸림
이같은 문제를 해결하기 위해 등장한 것이 바로 Swagger라는 오픈소스 프로젝트
Swagger를 사용하기 위해서는 먼저 pom.xml파일에 의존성을 추가해야함
<?xml version="1.0" encoding="UTF-8"?>
<project xmlns="http://maven.apache.org/POM/4.0.0"
         xmlns:xsi="http://www.w3.org/2001/XMLSchema-instance"
         xsi:schemaLocation="http://maven.apache.org/POM/4.0.0 https://maven.apache.org/xsd/maven-4.0.0.xsd">
    <modelVersion>4.0.0</modelVersion>

    <parent>
        <groupId>org.springframework.boot</groupId>
        <artifactId>spring-boot-starter-parent</artifactId>
        <version>2.5.6</version>
        <relativePath/> <!-- lookup parent from repository -->
    </parent>

    <groupId>com.springboot</groupId>
    <artifactId>api</artifactId>
    <version>0.0.1-SNAPSHOT</version>

    <name>api</name>
    <description>chapter5_api</description>

    <properties>
        <java.version>11</java.version>
    </properties>

    <dependencies>
        <dependency>
            <groupId>org.springframework.boot</groupId>
            <artifactId>spring-boot-starter-web</artifactId>
        </dependency>

        <dependency>
            <groupId>org.springframework.boot</groupId>
            <artifactId>spring-boot-configuration-processor</artifactId>
            <optional>true</optional>
        </dependency>

        <dependency>
            <groupId>org.projectlombok</groupId>
            <artifactId>lombok</artifactId>
            <optional>true</optional>
        </dependency>

        <dependency>
            <groupId>org.springframework.boot</groupId>
            <artifactId>spring-boot-starter-test</artifactId>
            <scope>test</scope>
        </dependency>

        <!--예제 5.21-->
        <dependency>
            <groupId>io.springfox</groupId>
            <artifactId>springfox-swagger2</artifactId>
            <version>2.9.2</version>
        </dependency>

        <dependency>
            <groupId>io.springfox</groupId>
            <artifactId>springfox-swagger-ui</artifactId>
            <version>2.9.2</version>
        </dependency>
    </dependencies>

    <build>
        <plugins>
            <plugin>
                <groupId>org.springframework.boot</groupId>
                <artifactId>spring-boot-maven-plugin</artifactId>
            </plugin>
        </plugins>
    </build>

</project>
위의 코드가 제대로 된 위치에 작성되고 제대로 코드를 적었다면 dependency를 업데이트해줌
->아래에서 @EnableSwagger2가 계속 빨간 색으로 뜨던 오류 해결!
Swagger와 관련된 설정 코드를 작성
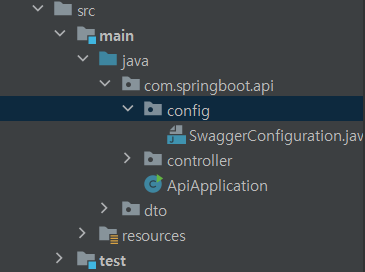
이 클래스는 설정(Configuration)에 관한 클래스로 com.springboot.api 하단에 config라는 패키지를 생성한 후에 그 안에 생성하는 것이 좋음
package com.springboot.api.config;

import org.springframework.context.annotation.Bean;
import org.springframework.context.annotation.Configuration;
import springfox.documentation.builders.ApiInfoBuilder;
import springfox.documentation.builders.PathSelectors;
import springfox.documentation.builders.RequestHandlerSelectors;
import springfox.documentation.service.ApiInfo;
import springfox.documentation.spi.DocumentationType;
import springfox.documentation.spring.web.plugins.Docket;
import springfox.documentation.swagger2.annotations.EnableSwagger2;

// 예제 5.22
@Configuration
@EnableSwagger2
public class SwaggerConfiguration {

    @Bean
    public Docket api() {
        return new Docket(DocumentationType.SWAGGER_2)
                .apiInfo(apiInfo())
                .select()
                .apis(RequestHandlerSelectors.basePackage("com.springboot.api"))
                .paths(PathSelectors.any())
                .build();
    }

    private ApiInfo apiInfo() {
        return new ApiInfoBuilder()
                .title("Spring Boot Open API Test with Swagger")
                .description("설명 부분")
                .version("1.0.0")
                .build();
    }
}
repositories { maven{ url "http://oss.jfrog.org/artifactory/oss-snapshot-local/" allowInsecureProtocol true } mavenCentral() }위의 코드는 build.gradle에 추가
그래야 오류 안 나고 잘 빌드됨
'공부 > 스프링부트 핵심가이드' 카테고리의 다른 글
04 스프링 부트 애플리케이션 개발하기 (0) 2023.07.13 03 개발환경구성 (0) 2023.07.13 02 개발에 앞서 알면 좋은 기초 지식 (0) 2023.07.12 01 스프링 부트란? (0) 2023.07.11 사용 설명서 (0) 2023.07.11